3D Print Coral Reefs with Sam Suchin of Hope3D

Blog 1: Post Processing by Michael Hall

So you now have your printed parts, and are now ready to begin putting your model together in the real world. Right away, you will notice the "trademark" of current FDM 3D printing technology; Build lines. It’s currently impossible to completely remove these lines through shrinking layer height alone, therefore they must be sanded out.

To do this, knock back particularly rough areas with a box cutter blade, however if your machine spits out average quality parts you can skip this step.

Take eighty grit sandpaper and give your parts a thorough once over.


Follow this step with 220 grit, 400 grit, and 800 grit. You may go even higher depending on the final finish you want to achieve.

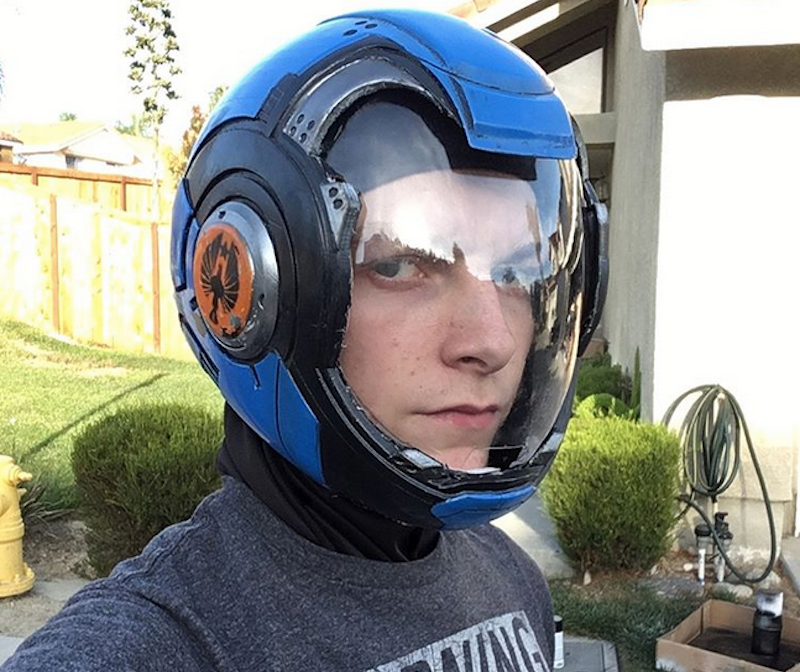
For glossy finishes, 400 to 800 is recommended. For chrome or metallic finishes, sand to at least 800, however higher grits will improve the look of your parts greatly.

While most of your print can be sanded with paper, sanding sticks and files will get into those hard to reach places.

For consistent pressure, (when trying to maintain compound curves) you may want to utilize a sanding sponge instead with the appropriate grit. You may want to wet sand your parts at the last grit for an extra smooth texture. Simply wet your sandpaper by dunking it in water, and sand the part slightly more gently than before.

Between passes of sanding, it is as important to remove material through sanding, as it is to fill the low spots in your prints. To do this, use a product called filler primer. It comes as a spray paint, to use simply apply an even layer as indicated on the back of the can. You’ll need a lot of this stuff for full size props, luckily it is only about five dollars a can. If your project is printed in several pieces, you will have seam lines that appear in your model.

If they’re not modeled to appear as panel lines, or modeled in a way that will hide the lines, you will need to fill in the seams after gluing the parts together. To do this, Bondo is a popular choice. Mix the bondo according to the instructions on the can, and slather the pinkish goop over your seam lines, and any imperfections sanding alone cannot fix. Remember to add slightly more than you need, however not so much that will take a long time to sand back down. After the filler cures, sand the fills as you sanded the rest of the model.

Use 220 grit to sand most of the fill back, however 80 grit is a great place to begin when you have a lot of filler to get through. Then, finish it off with 400, and stop when you’ve smoothed out your seam or imperfection to the finish you would like. It can be challenging to know when you have completely smoothed your part, and this is where another coat of filler primer will help you see how much more sanding is required. Never leave filler primer unsanded, you must always sand your finish back into the primer.

![]()
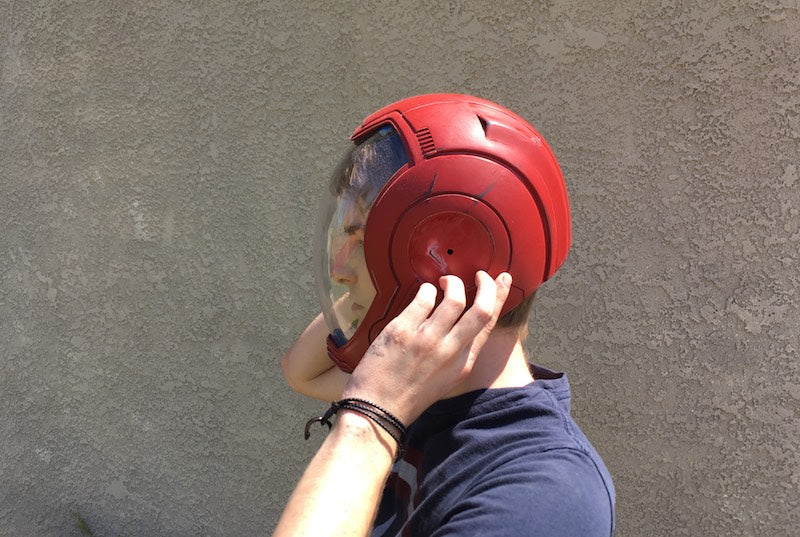
As for adhesives, I recommend super glue and five minute epoxy. Remember to sand your connection points before gluing to add a “tooth” for the adhesive to catch on. For most applications super glue works perfectly for a quick, strong connection. When you require more working time to align parts, use five minute epoxy. You have five minutes to align your parts as straight as possible, and it’s much more durable than a super glue connection. For helmets, I also back the inside of the seam with five minute epoxy after I’ve super glued the parts together for a connection I can count on not snapping off while I apply pressure when sanding.

For especially large pieces, ten minute epoxy may be something to consider. Remember, the five minute epoxy won’t grab the other part until five minutes are up, therefore, you’ll have to hold your parts by hand for that time period, or use tape, clamps, or all of the above. Don’t worry if the tape fuses with the part either, it can be sanded off.